This guide must be reviewed with your installer before installation begins. Proper installation of terracotta tiles requires an installer experienced with natural clay materials. Megzo cannot be held responsible for installation practices or issues arising after tiles have been installed.
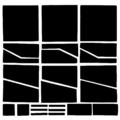
Megzo Terracotta tiles are handmade using natural clay and traditional firing methods. Variations in tone, texture, and dimensions are normal and part of the authentic character of terracotta surfaces.
Product Characteristics & Order Inspection
Terracotta tiles are handmade, and natural variations should be expected, including:
tonal variation between tiles,
slight differences in size and thickness,
surface texture differences,
minor edge irregularities.
These variations contribute to the natural appearance of terracotta installations.
Upon delivery, orders should be inspected before installation. Installed material is considered accepted. To account for cuts, variation, and possible transport breakage, it is recommended to order at least 15% additional material.
Preparation Before Installation
Before installation begins:
Mix tiles from all boxes to distribute natural variation evenly.
Lay out tiles dry to confirm tonal balance and layout.
Remove dust and residue using a pH-neutral cleaner.
Allow tiles to dry completely before installation.
Avoid acidic cleaners, which may damage terracotta.
Grout color selection significantly affects the final appearance. Neutral tones or grout colors matching the tile are commonly used depending on the desired result. Installer and client should confirm expectations before installation.
Installation Process
All tile cuts must be performed using a water-cooled tile saw with a diamond blade. Tiles should be cleaned immediately after cutting to avoid staining from cutting residue.
Installation surfaces must be:
clean,
stable,
dry,
and properly leveled.
Subfloors must be fully cured before installation to prevent moisture migration that may cause staining or cracking. In some cases, uncoupling membranes may be recommended.
Tile installation process:
Apply suitable thin-set mortar evenly to the surface.
Lightly dampen the back of each tile before adhesive application.
Apply adhesive consistently to prevent air pockets.
Install tiles in small working sections.
Press tiles firmly into place.
Use a rubber mallet if needed to ensure proper contact.
Maintain consistent spacing, typically around 1/8″ or as required by design.
Remove excess adhesive immediately to prevent staining.
After installation, allow adhesive to cure for at least 48 hours before sealing and grouting.
Pre-Grouting Sealing
Terracotta tiles must be sealed prior to grouting:
Ensure tiles are clean and dry.
Apply penetrating sealer in thin layers until saturation is achieved.
Remove excess sealer before drying.
Avoid over-application which may create surface film.
Allow sealer to cure fully before grouting.
Always follow manufacturer recommendations for curing times.
Grouting
Grouting should be done carefully to avoid staining:
Work in small sections at a time.
Apply grout evenly between joints.
Immediately remove excess grout using clean water and appropriate cleaning tools.
Clean surfaces thoroughly after grouting.
Allow grout to cure fully before final sealing.
Tiles must be completely clean and dry before applying final protective treatment.
Final Sealing & Protection
After grout curing and final cleaning:
For interior installations:
Apply a protective finishing treatment to improve stain resistance and preserve appearance.
For exterior installations:
Apply penetrating sealer suitable for outdoor conditions.
During ongoing construction, tiles should be protected with appropriate covering materials to avoid damage or staining.
Edge Finishing
Where possible, installations may be aligned flush with adjacent finishes to avoid trims.
Where edges remain visible, solutions include:
miter-cutting tiles to create finished corners,
or using suitable edge profiles when required.
Maintenance & Cleaning
Terracotta surfaces naturally develop patina over time, enhancing their character.
Regular maintenance includes:
sweeping or vacuuming to remove abrasive debris,
cleaning with warm water and pH-neutral cleaners,
promptly removing spills, especially oil or grease.
Acidic cleaners must be avoided as they can damage terracotta.
Resealing
Terracotta installations should be resealed periodically depending on traffic and exposure conditions. Follow sealer manufacturer recommendations for maintenance frequency.
Installation Safety
During installation:
Use dust masks and eye protection when cutting tiles.
Perform cutting outdoors or in well-ventilated areas when possible.
Wash hands thoroughly after handling installation materials.
Megzo Terracotta tiles are natural materials shaped by craftsmanship. Proper installation and maintenance allow their warmth and character to evolve naturally, creating surfaces designed to endure and age beautifully over time.
To provide the best experiences, we use technologies like cookies to store and/or access device information. Consenting to these technologies will allow us to process data such as browsing behaviour or unique IDs on this site. Not consenting or withdrawing consent, may adversely affect certain features and functions.
Functional
Always active
The technical storage or access is strictly necessary for the legitimate purpose of enabling the use of a specific service explicitly requested by the subscriber or user, or for the sole purpose of carrying out the transmission of a communication over an electronic communications network.
Preferences
The technical storage or access is necessary for the legitimate purpose of storing preferences that are not requested by the subscriber or user.
Statistics
The technical storage or access that is used exclusively for statistical purposes.The technical storage or access that is used exclusively for anonymous statistical purposes. Without a subpoena, voluntary compliance on the part of your Internet Service Provider, or additional records from a third party, information stored or retrieved for this purpose alone cannot usually be used to identify you.
Marketing
The technical storage or access is required to create user profiles to send advertising, or to track the user on a website or across several websites for similar marketing purposes.